ブログ
これまでに経験してきたプロジェクトで気になる技術の情報を紹介していきます。
Install laravel on centos 7
 Wesley
6 years
Wesley
6 years
Laravel is an opensource framework that is built in PHP.
Laravel is nowadays one of the most popular frameworks. Laravel provides several tools that you need for writing clean, modern and maintainable code.
In today's tutorial, we are going to learn how to your first Laravel applications on centos 7.
Step 1: Seting up yum repositories
To start with the install process, you first need to enable the right REMI and EPEL repositories in your centos distribution to have the updated packages (PHP, Nginx, MariaDB, etc.). You can set up the repositories with the following commands;
rpm -Uvh https://dl.fedoraproject.org/pub/epel/epel-release-latest-7.noarch.rpm
rpm -Uvh http://rpms.famillecollet.com/enterprise/remi-release-7.rpm
Step 2: Install Httpd
Next, we need to install a working web server environment on your system. If you already have a working web server environment on your centos system, you can skip this step, if not install it with the following commands.
yum install httpdOnce httpd has been installed, it's time to start the webserver and enable it to start of every system boot.
systemctl start httpd
systemctl enable httpd
After httpd has been installed, make sure to verify it's status to check if it is running or not. You can verify the state with the next command.
systemctl status httpdTo access httpd from a public network, you need to open a port 80 on your system firewall to receive external requests, as shown. This can be done with the following command
firewall-cmd --permanent --add-port=80/tcp
firewall-cmd --reload
Step 3: Install Mysql
Now Nginx has been installed; it's time to install MySQL, we use MariaDB for this. Let's install MariaDB
yum install mariadb-server php-mysqlAfter MariaDB has been installed, you must start and enable the service.
systemctl start mariadb.service
systemctl enable mariadb.service
Make sure to verify it's status to check if it is running or not. You can verify the status with the next command.
systemctl status mariadb.serviceThe lest step is setting up the MySQL secure installation process.
/usr/bin/mysql_secure_installationMake sure to follow the steps on the command line and set your root password.
Step 4: Install php
To install PHP 7.2, we start with the yum utilities.
yum install yum-utilsAfter the yum utilities are installed we can enable the PHP packacge and install PHP.
yum-config-manager --enable remi-php72Now let's install PHP 7.2
yum install php php-fpm php-common php-xml php-mbstring php-json php-zipNext, let's start and enable PHP-FPM service and let's check if the service is up and running.
systemctl start php-fpm
systemctl enable php-fpm
systemctl status php-fpm
Step 5: Install Composer and Laravel PHP Framework
Now let's install Composer, the composer is a dependency manager for PHP, we use this dependency manager to install Laravel. You can install Composer with the following commands.
curl -sS https://getcomposer.org/installer | php
mv composer.phar /usr/local/bin/composer
chmod +x /usr/local/bin/composer
Once you have installed Composer, let's move to the HTML folder
cd /var/www/html/Here you can install Laravel by running the composer create-project command, as follows.
sudo composer create-project --prefer-dist laravel/laravel testprojectNow when you do check what files are in the web document root, the testsite directory should exist in there, containing your Laravel files.
ls -l /var/www/html/testsiteExample
Apr  1 23:25 app
Mar 24 17:31 bootstrap
Mar 26 08:02 config
Mar 24 17:31 database
Mar 30 01:16 public
Mar 24 17:31 resources
Mar 26 08:30 routes
Apr  2 03:14 vendor
Mar 27 03:01 artisan
Mar 27 12:31 .env.example
Mar 27 12:31 package.json
Mar 27 12:31 phpunit.xml
Apr  2 03:14 composer.json
Apr  2 03:14 composer.lock
Mar 27 12:31 README.md
Mar 27 03:01 server.php
Mar 24 17:31 storage
Mar 27 03:01 .styleci.yml
Mar 27 12:31 webpack.mix.
Step 6: Configure Laravel Installation
Now it's important that we set the appropriate permissions on the testproject directory and Laravel files using following commands.
chmod -R 775 /var/www/html/testproject
chown -R apache.apache /var/www/html/testproject
chmod -R 777 /var/www/html/testproject/storage/
If you have SELinux enables, make sure to update the security context of the storage and bootstrap/cache directories using following commands.
semanage fcontext -a -t httpd_sys_rw_content_t '/var/www/html/testproject/bootstrap/cache(/.*)?'
semanage fcontext -a -t httpd_sys_rw_content_t '/var/www/html/testproject/storage(/.*)?'
restorecon -Rv '/usr/share/nginx/html/testproject'
Now let's create an environment file for your application using the sample file provided.
cp .env.example .envNext, Laravel uses an application key to secure user sessions and other encrypted data. So you need to generate and set your application key to a random string using the following command.
php artisan key:generateStep 7: Acces your first Laravel Installation
If you did everything correctly, Laravel should now be installed, and you can access it through your browser. You can visit your first Laravel project by visiting the following link.
http://[your-ip-adress]/textproject/public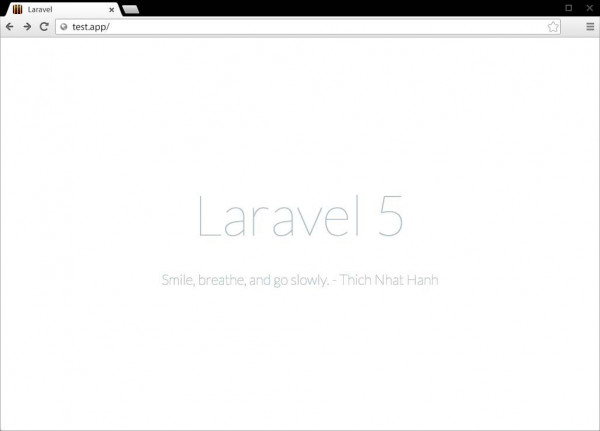
You are now ready to go, and you can start developing your first Laravel website.
コメントはありません。